When my mom asked if we would like to use this, I jumped on the chance. It is a tall skinny piece of furniture that works perfectly in one of the corner's of the nursery. To help us get started, my mom did an awesome job of removing all the fabric and stripped it down to just a plain white, wood dresser. My plan for the dresser from that point was really simple: paint it blue. However, I married a man whose father can build furniture (as in nice, detailed wood furniture) and can fix up furniture (like dressers that are more than a few years old and have suffered the abuse of small children). He opened one drawer and realized the dresser needed a little TLC.
First the dresser had a few divots. We used Minwax stainable wood filler to fill the divots and then used a very thin piece of sandpaper to smooth it down. Our prep work took just about five minutes.
One drawer was a bit wobbly and needed some fixing. I don't even know the name of this tool but it stabilized the drawer so that Mr. Sinks could add a couple of very small nails.
We obviously needed a construction manager during the process. Addison took care of overseeing the process.
And Mackenzie served as the construction management support team. She watched the entire process from the top of the stairs. Don't you like how she even brought a toy up there with her?
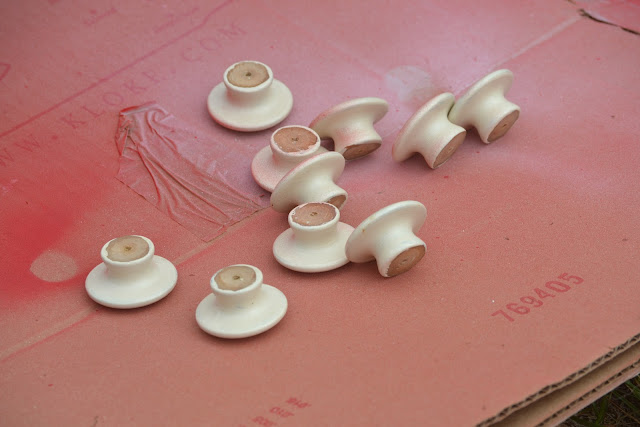
Once the dresser was stable and ready for painting, Alan removed the drawer pulls. I was originally thinking we would paint the dresser blue and then buy different drawer pulls. But Jessica did me a solid and came up with the idea of using the spray paint from the highchair. We had the spray paint on hand and the color matches perfectly. And I didn't have to buy anything else for this project. Woot woot!
This is a nice shot of the drawer pull-painting in progress. We even used the same piece of cardboard that we put down when we re-did the highchair. As you can see, the pulls are pretty sizable and I'm glad we were able to preserve them. The red pops really nicely. To paint the dresser we used a paint brush and a roller. I have to say that painting with a roller is much smoother and easier. Overall it just creates a better look. We eventually gave up on the brush and used the roller exclusively.
Proof that I helped and that we had a fan going during the whole process (plus a window open). We applied one coat and let it dry overnight. We then did a few touch ups with the sandpaper and smoothed out any clumps of paint before applying the second and final coat of paint.
The drawer pulls also received two coats of paint. Because of their shape they were a bit more interesting to fully coat. Luckily our brother in law likes spray paint and took care of that for us.
A fun action shot of me before applying the second coat. I know you love the hair! As a tip for painting, not hair, the best way to store your brushes or rollers in between coats is to wrap them in saran wrap and store them in the refrigerator or freezer. You can see the saran wrap in my right hand below.
All the work was completed over Labor Day weekend and just this past weekend, Alan and Shaun put the dresser together and brought it home to the nursery. Since the nursery isn't ready yet, I'll share a couple of the completed photos of just the dresser.
I love it! I think the finished product looks fantastic and I love that we worked so hard to bring it a new life. And maybe best of all, we were able to use an old piece of furniture that we didn't have to pay for, added some nails to make it more sturdy and paint to spruce it up. BAM! A totally new and unique piece of furniture. And how cool will it be for us to tell our son that this was a dresser my mom passed down to me and his grandpa helped fix up during a very short respite from his deployment?


No comments:
Post a Comment